How to Fix Syncthing Auto-Start on Windows
I just finished setting up Syncthing on a Windows laptop for probably the 10th time, but I do it just infrequently enough that I always forget why I can't get the auto-start through Task Scheduler to work correctly. For my own future sanity, and hopefully yours, I documented the entire process so I (we) can refer back to it next time.
The steps outlined below are fairly similar to the official guide on Syncthing's website, but I added some notes and tried to make it easier by adding more images, notes and details.
Table of Contents
Laptop Users
If you found this post because you followed the official guide but it's still not working on you're Windows laptop, let me save you the hassle of walking through all the steps again:
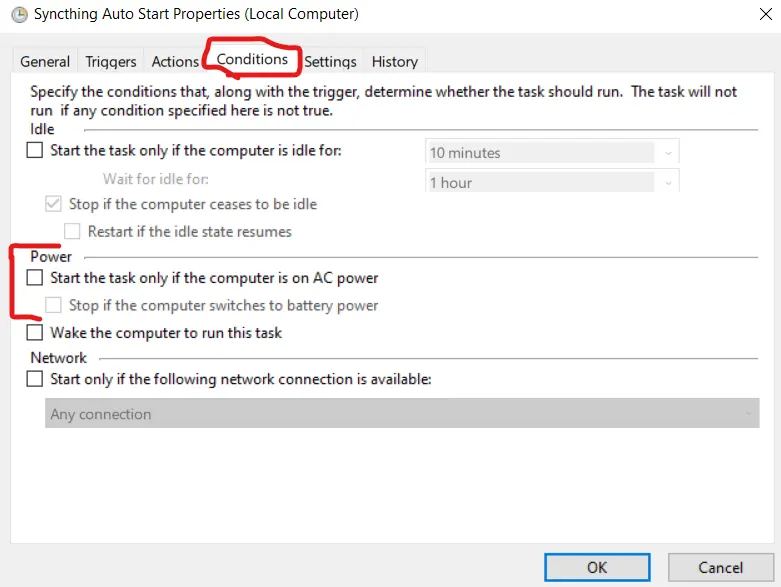
Check your Conditions tab and see if the check marks under Power are enabled to only run when the laptop is plugged in. They mention this on the official guide, but if you're like me, you powered through the primary steps and skipped the "optional" settings at the bottom.
I added this as step 5 in the complete guide below.
Overview
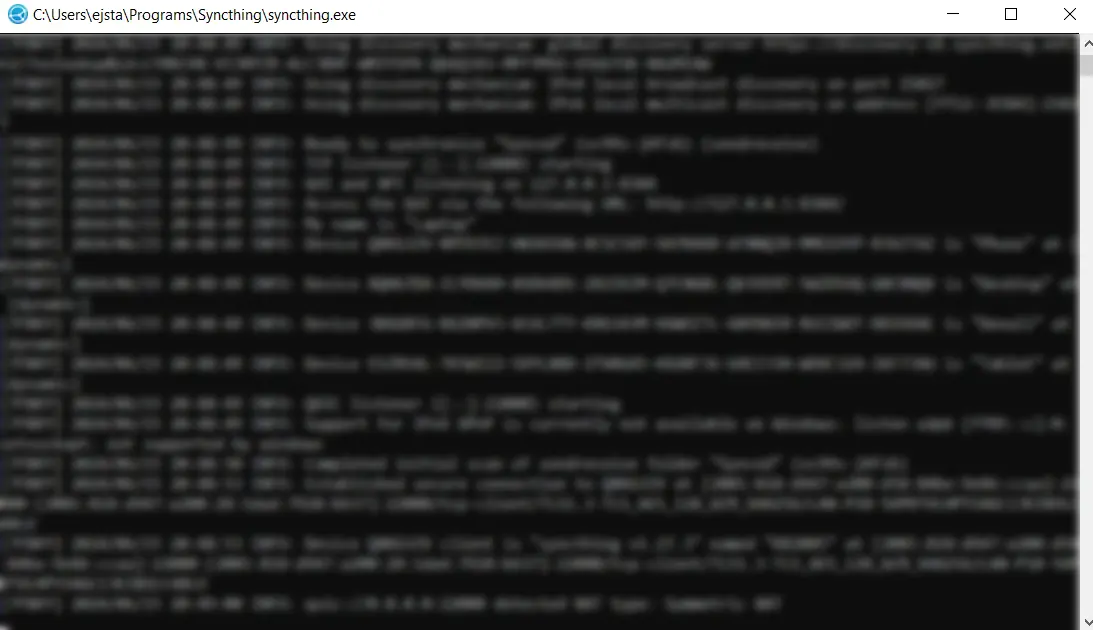
If you are not a laptop user looking for the quick solution above, or want thorough guide for getting Syncthing to start automatically on Windows, below is the step-by-step process to achieve that. In addition to starting automatically, we are also going to configure Syncthing to launch and run without having a console window open like this:
1. Start Task Scheduler
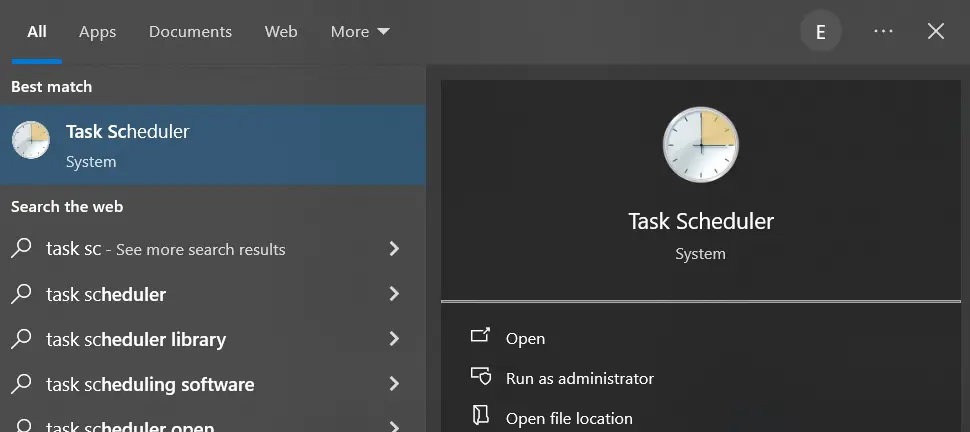
Pretty self-explanatory, but not everyone uses this on a regular basis. Hit the Windows key or click on the start menu and start typing Task Scheduler.
2. Create New Task
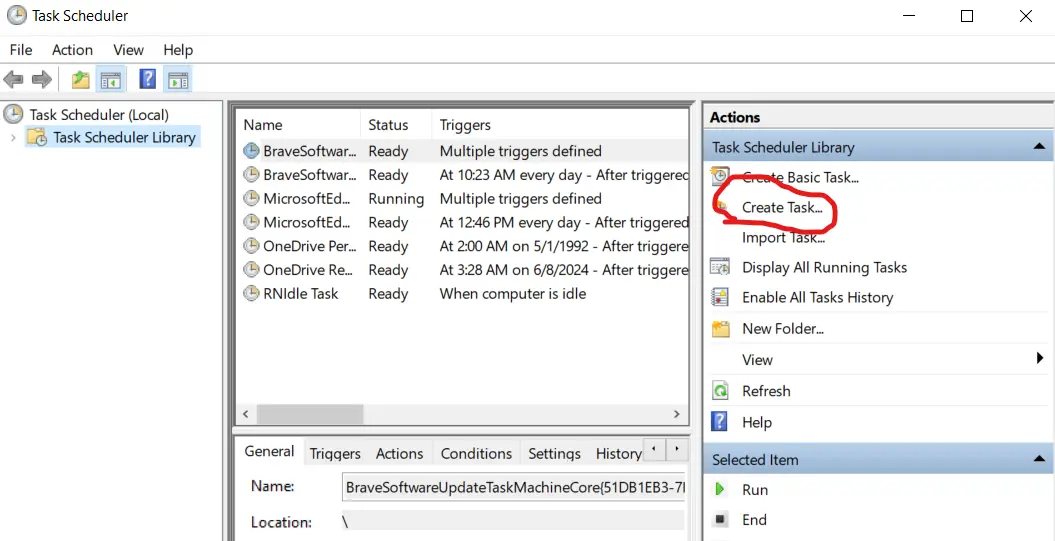
On the right side of the Task Schedule screen, there should be an option to create a new task. You want to select the regular task, not the basic one. Here is what it should look like:
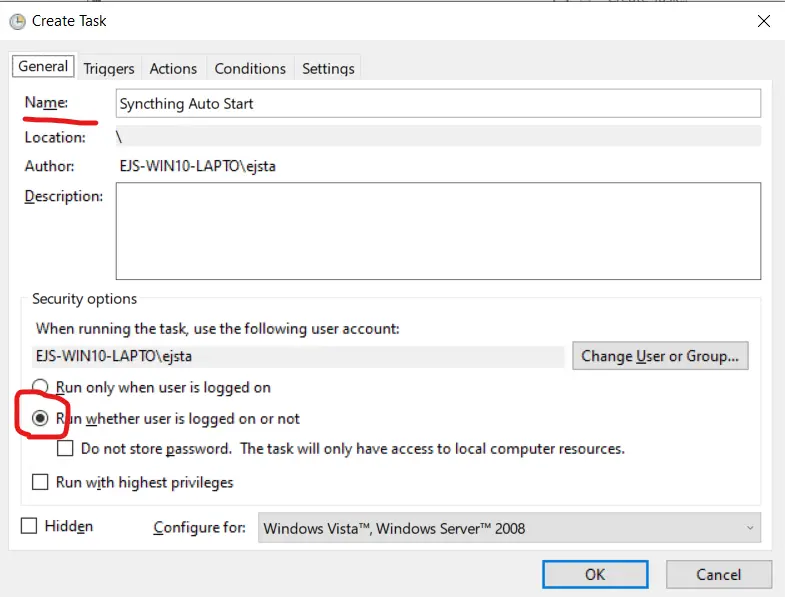
This should open up to the General tab on the new task window. These are what we need to pay attention to:
- Name: This can be whatever you want, but should probably have something with Syncthing in it to remind yourself later.
- Security Options: The official Syncthing guide says to have
Run whether user is logged on or notselected, and this always works for me. We will set it up to only trigger when your user logs in later.
3. Add & Configure Trigger
Now we are going to tell Windows when we want Syncthing to automatically start. Navigate to the Trigger tab and select New...:
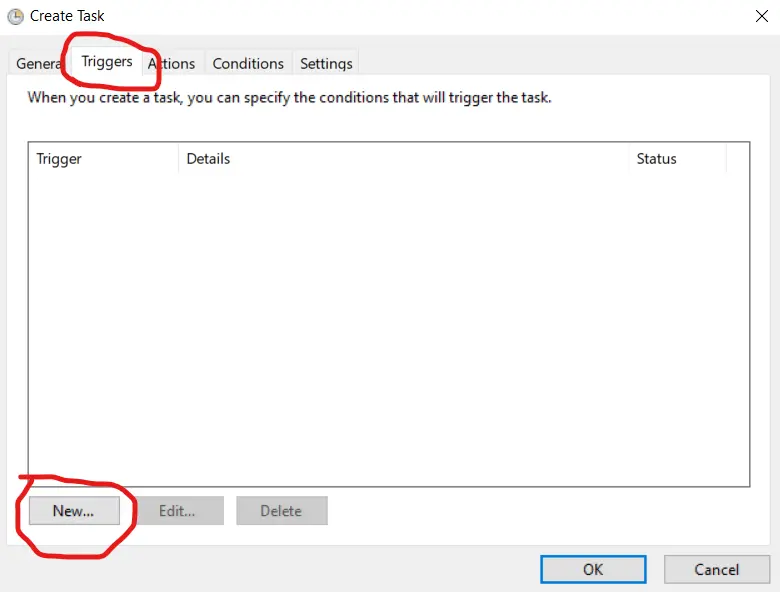
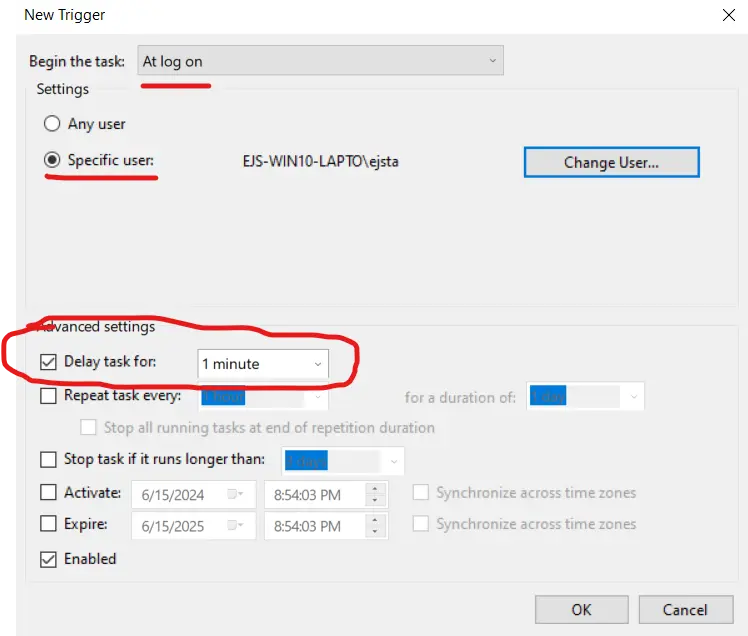
Once the Trigger menu is open, we want to configure it so Windows starts Syncthing when you log in. Feel free to adjust these to suit your own needs. However, I recommend copying them down as listed to make sure everything works as intended. Once its starting and running correctly, adjusting one setting at a time will help isolate any issues in the future.
- Begin the task: Select
At log on - Specific user: Choose your Windows user. You may have a reason to select
Any user, but I suggest following the advice above and getting everything working first. I know the settings work as listed in this guide, but cannot vouch for other configs. - Advanced settings: I always add a delay here to ensure the trigger doesn't get lost in the startup shuffle. I've run into intermittent issues when not having this set.
4. Add New Action
Next, we are going to move to the Action tab and create a new one. The Trigger tag told Windows when, now we are going to tell Windows what (to do):
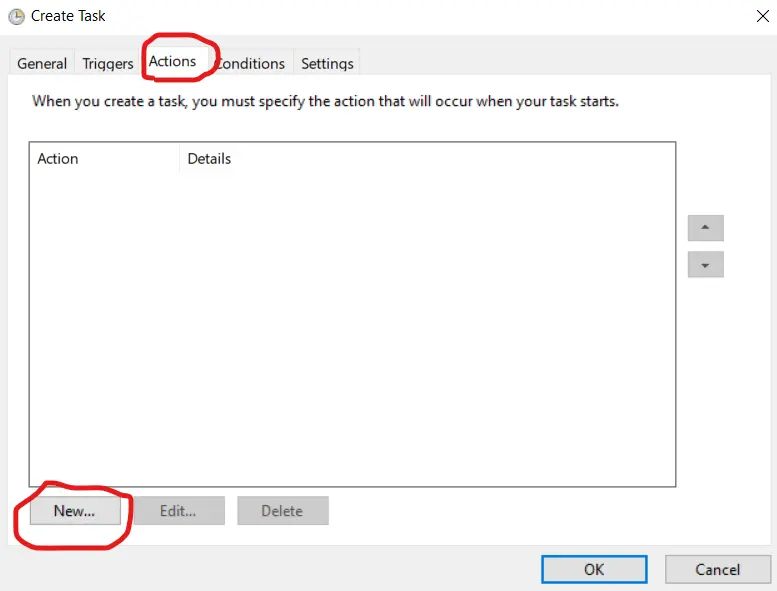
Here is what we want to tell Windows to do:
- Open a program
- Open the program at this location (Syncthing)
- Do not open a console or browser window
Number three is important if you do not want a console window popping up every time you log into Windows. If this isn't set correctly, Syncthing will shut down every time you close the console window.
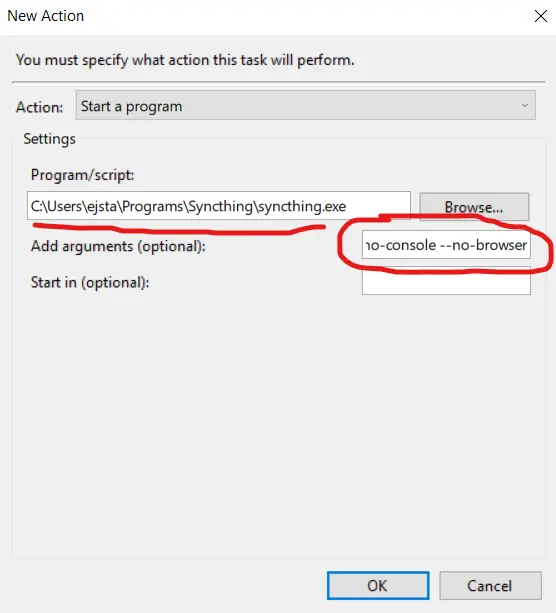
Here are the settings to check and/or update:
- Action: Start a program
- Program/Script: Browse through your directories and find the
Syncthing.exeexecutable. Do not use my location in the image below as an example. I have mine installed in a custom location within my user directory. The typical install location is either in yourProgramsdirectory, orC:\syncthing\syncthing.exe. - Add arguments (optional): This is not optional if you want to prevent the console and web browser from opening after log in. In the arguments text box, put
--no-console --no-browser
5. Conditions & Power Options
This is the section that is mentioned in the official Syncthing guide, but added as optional after the primary steps. These settings are of particular importance if you are using a laptop, since the default settings can prevent the task from starting when running off the laptop battery. If you are setting this up on a desktop computer, you can probably skip this tab.
Laptops:
By default, both Start the task only if the computer is on AC power and Stop if the computer switches to battery power are likely selected. If you uncheck the top one first, you will not be able to deselect the second. Here is the order of operations:
- Deselect
Stop if the computer switches to battery power - Deselect
Start the task only if the computer is on AC power
6. Task Settings Tab
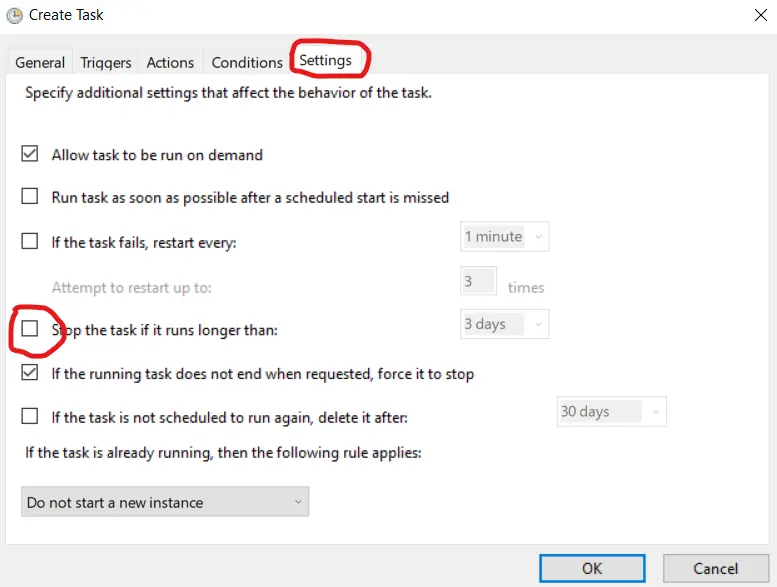
The last configuration step is on the Settings tab:
- Deselect
Stop the task if it runs longer thanoption. - (Optional) I personally select the
If the task fails, restart everyoption, and set the retry attempts to 3 and the delay to 1 minute. This isn't required, but I prefer to use it as a backup.
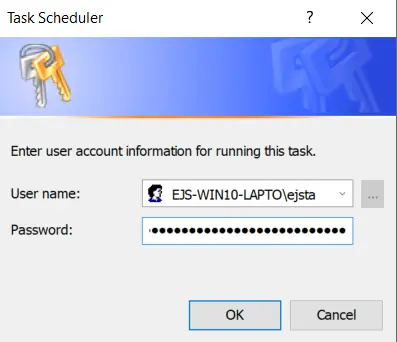
After making the changes, click OK. You should be prompted for your Windows password, so enter that and click OK one more time.
7. Restart & Test
After inputting your Windows password, its time to restart your computer and see if it works. REMEMBER: If you followed this guide exactly, we added a 1 minute delay after logging in. Make sure to account for additional time before throwing your monitor out the window.
After restarting, you can quickly check if Syncthing is running using one of these methods:
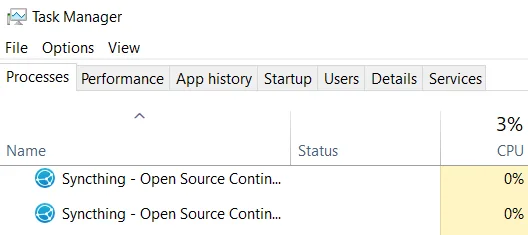
Task Manager
Open up Task Manager and browse through the active programs under the Processes tab. If successful, you should find Syncthing running:
Web UI
Alternatively, you can visit the local web UI address and verify Syncthing is running. For example, http://localhost:8384/. Your address and/or port may be different than this, so double check if it doesn't work.
Final Thoughts
As I mentioned in the introduction, I always forget about the power settings when I set this up on a Windows laptop. Hopefully everything worked out on your end and Syncthing is up and running automatically. If you have any questions, comments or concerns, feel free to drop me a line.


