How to Implement Continuous Deployment for Your Grav Website

Understanding the core concepts are important as you venture into the world of Continuous Deployment (CD). This section will introduce you to what CD is and why it's particularly beneficial for Grav websites. If you already know what CD is and want to jump straight to the meat and potatoes, use the table of contents below.
Table of Contents
- What is Continuous Deployment?
- Why Use CD With Grav?
- Prerequisites
- Version Control with Git
- Build Process
- Deployment Tools & Strategies
- Configuration Management
- Automating Server Configuration
- Database Migrations
- Rollbacks and Fail-Safes
- Best Practices and Tips
- Further Reading and Resources
- More Grav Guides
What is Continuous Deployment?
Continuous Deployment is an advanced practice of software development where code changes are automatically prepared for a release to production. It implies that:
-
Every change that passes all stages of your production pipeline is released to your users. There's no human intervention, and only a failed test will prevent a new change to be deployed to production.
-
The fundamental principle is to ensure that you can reliably and instantly release more frequent updates, enhancing your product's agility and responsiveness to feedback.
# Hypothetical CD pipeline flow
git commit -m "Add new feature"
git push origin main
# Automated tests run
# If tests pass, changes are deployed to production
^Don't be like this guy. Use branches, people.
Why Use CD With Grav?
- Flat-File CMS: Grav, being a flat-file CMS, doesn't involve traditional databases. This simplifies the deployment process, making CD an attractive proposition.
- Rapid Iteration: With Grav's straightforward structure, developers can rapidly iterate over changes, and with CD, these changes can be instantly made available to users.
- Reduced Errors: Automated testing, which is an integral part of CD, ensures that most errors are caught before they reach the production environment. This is especially beneficial for Grav websites where even small errors can hinder the site's functionality.
- Efficient Content Updates: For content-driven sites using Grav, CD allows for seamless and swift content updates, ensuring the site's content remains fresh and updated.
Prerequisites
Before diving into the specifics of Continuous Deployment for a Grav website, it's important to ensure you have a solid foundation and all the necessary tools and knowledge at your disposal.
Knowledge Requirements
-
Understanding of Grav: Familiarize yourself with Grav's flat-file architecture, themes, plugins, and general CMS functionalities.
-
Basic Linux Commands: Familiarity with basic Linux commands and server management will be essential, especially when configuring environments. If these look foreign, start with an intro to command line guide:
ls # List directory contents cd # Change directory mkdir # Make directory -
Version Control: An understanding of Git, its operations, and concepts such as branching, merging, and commit management is fundamental.
Software and Tools
-
Grav Installation: If you haven't already, ensure Grav is installed.
# Download and extract Grav curl -O -L https://github.com/getgrav/grav/releases/download/<version>/grav-admin-v<version>.zip unzip grav-admin-v<version>.zip -
Web Server: Software like Nginx or Apache to serve your Grav website.
-
Text Editor or IDE: Tools like Visual Studio Code, Atom, or PhpStorm for code editing and management.
-
Terminal or Command Line Interface: To execute commands, manage files, and interact with servers.
Setting up Grav on Debian
-
Installing Dependencies:
sudo apt update sudo apt install curl unzip php-cli php-fpm php-json php-common php-mbstring php-zip php-curl php-xml php-pear php-bcmath -y -
Download and Set Up Grav:
# Move to your web server directory (e.g., /var/www)
cd /var/www
# Download and extract Grav
curl -O -L https://github.com/getgrav/grav/releases/download/<version>/grav-admin-v<version>.zip
unzip grav-admin-v<version>.zip
# Assign appropriate permissions
sudo chown -R www-data:www-data /var/www/grav
Version Control with Git
Setting up a Git Repository
-
First, you need to have
gitinstalled. If you don't have it installed, you can do so using the following command:sudo apt update && sudo apt install git -y -
Once git is installed, you can initialize a new repository by navigating to your project's root directory and running:
git init -
To track the new repository or an existing one, you can use the following commands respectively:
git remote add origin <your-repository-url>OR
git clone <your-repository-url>
Connecting Local Grav with Git
-
Inside your Grav root directory, create a
.gitignorefile to specify files or directories you don't want to track:touch .gitignoreSome common entries for a Grav site might be:
/cache/* /logs/* /images/* /user/accounts/* -
Add and commit the Grav project to the repository:
git add . git commit -m "Initial commit" -
Push the changes to your remote repository:
git push -u origin masterIt's 2023, you should probably start using main.
Git Branching Strategy
-
It's essential to have a branching strategy to ensure efficient workflow and avoid conflicts. The commonly used strategy is the Feature branching strategy.
-
The main branch (
masterormain) should be the production-ready state of your app/website. -
For every new feature or bugfix, create a new branch:
git checkout -b feature/new-feature-nameOR for bugfixes:
git checkout -b fix/bug-name -
Once the feature or fix is tested, it can be merged into the
developorstagingbranch. After thorough testing in a staging environment, changes fromdevelopcan be merged intomasterormain. -
Always ensure to pull the latest changes from the branch you intend to merge to, before actually merging. This ensures that you're testing against the latest code:
git pull origin master -
If using platforms like GitHub or Bitbucket, Pull Requests (PRs) or Merge Requests (MRs) can be a good way to review code before it gets merged. If your still new to this type of process, the web UI can also help visualize what is happening.
Build Process
Automated Testing for Grav
Ensuring your Grav site works correctly is important before deployment. You can use PHPUnit or Codeception for PHP-based testing.
-
First, install PHPUnit:
composer require --dev phpunit/phpunit -
Write unit tests and ensure they are organized in a directory, e.g.,
/tests. Here is a thorough guide on running tests with PHPUnit. -
To run the tests:
./vendor/bin/phpunit --bootstrap vendor/autoload.php tests
Building Static Assets
For Grav, you might be using tools like Webpack or Gulp to compile and minify your assets. Here's a generic approach using Gulp:
-
Install Gulp CLI globally and the local project:
npm install --global gulp-cli npm init npm install --save-dev gulp -
Create a
gulpfile.jsin the project root. Define tasks like Sass compilation, JS minification, etc. -
To run the defined Gulp tasks:
gulp <task-name>
Packaging the Grav Site
Before deploying, you can package the Grav site to ensure a smooth transfer of files and maintain directory structures.
-
Navigate to the directory above your Grav installation.
-
Use
tarto package the site:tar czf grav-site.tar.gz grav/ -
This creates a compressed
.tar.gzfile, which you can then transfer to your server or deployment tool.
Deployment Tools & Strategies
Choosing a Deployment Tool
Depending on your preference, infrastructure, and requirements, you can choose from a plethora of tools:
-
Jenkins: An open-source tool that offers great flexibility and a vast array of plugins. Website
# Example: Installing Jenkins on Debian wget -q -O - https://pkg.jenkins.io/debian/jenkins.io.key | sudo apt-key add - sudo sh -c 'echo deb http://pkg.jenkins.io/debian-stable binary/ > /etc/apt/sources.list.d/jenkins.list' sudo apt update sudo apt install jenkins -
Travis CI: Integrated with GitHub, it's easy to set up for projects hosted there. Website
# .travis.yml example for Grav language: php php: - '7.4' script: phpunit YourTestFile.php -
GitHub Actions: Directly integrated into GitHub, it's versatile and works seamlessly with GitHub repositories. Website
# .github/workflows/main.yml example name: Grav Deployment on: [push] jobs: deploy: runs-on: ubuntu-latest steps: - uses: actions/checkout@v2 - name: Deploy to Server run: rsync -avz . user@your-server.com:/path/to/grav -
Docker: A favorite in the development world. Click here for complete guilde on setting up a Grav environment with Docker.
Configuring the Deployment Pipeline
-
Source Control: Start by setting up hooks or triggers on your VCS (e.g.,
git) to notify the CI/CD tool when changes are pushed. -
Build & Test: As discussed in the previous section, integrate automated testing into your pipeline.
-
Deployment: Use tools like
rsyncorscpfor transferring files to the server.rsync -avz . user@your-server.com:/path/to/grav
Deployment Strategies
-
Blue-Green Deployment:
- Maintain two environments: Blue (current production) and Green (new version).
- After testing the Green environment, you redirect all traffic to Green.
- Advantage: Instant rollback in case of issues by switching back to Blue.
-
Canary Deployment:
- Deploy the new version to a subset of users.
- Monitor and observe how the new release performs.
- If everything goes well, roll out the update to all users.
- Advantage: Reduces the risk by gauging the effect of the new release on a smaller audience first.
Configuration Management
Environment Configuration
Managing different environments like development, staging, and production is extremely important. Each environment may have different configurations.
-
Environment Variables: Use environment variables to manage settings specific to each environment.
export DATABASE_URL="mysql://user:password@localhost/dbname" -
Configuration Files: If you're using Grav's
.yamlconfigurations, you can have specific configuration files for each environment and load them dynamically based on the active environment.
Secret Management
Securing sensitive information like API keys, database passwords, etc., should always be a top priority.
-
Using
.envFiles: Store configurations in a.envfile that is not tracked by source control. You can use libraries likephpdotenvto load them.composer require vlucas/phpdotenv -
Usage:
<?php $dotenv = Dotenv\Dotenv::createImmutable(__DIR__); $dotenv->load(); $db_password = $_ENV['DB_PASSWORD']; -
Secure Secret Storage: For more robust secret management, consider using tools like HashiCorp's Vault or AWS Secrets Manager.
# Example: Using Vault to fetch a secret vault kv get secret/my_secret -
Restricting Access: Always ensure that only authorized personnel can access and modify secrets. Consider using Role-Based Access Control (RBAC) and frequently auditing access logs.
Automating Server Configuration
-
Ansible: A simple IT automation tool that doesn't require agents or a centralized server. Website
sudo apt update
sudo apt install ansible -y
A simple Ansible playbook for Grav setup might look like:
--- - hosts: your_server_ip tasks: - name: Ensure Nginx is installed apt: name: nginx state: present -
Chef: An automation tool used to define infrastructure as code and ensure server configurations are correct. Website
-
Puppet: Another configuration management tool to automate provisioning and management of servers. Website
For both Chef and Puppet, the setup can get intricate. However, they offer robust solutions for large-scale infrastructure.
Database Migrations
Grav is a flat-file CMS by design, so it doesn't rely on databases in the traditional sense. However, for Grav sites that integrate with external databases or for users who might be merging Grav with other platforms, migrations can be a concern. Here's a general approach:
Versioning Your Database
-
Start by versioning your schema: Every time there's a change in the database schema, it should be recorded.
# An example with a SQL file (just as a representation):
echo "CREATE TABLE users (id INT, name VARCHAR(255));" > migrations/001-initial-schema.sql
Automating Database Migrations
Automating migrations ensures consistency across different environments.
Phinx: A popular PHP migration tool. Link to Github
composer require robmorgan/phinxTo initialize Phinx:
./vendor/bin/phinx init-
Creating Migrations:
./vendor/bin/phinx create MyNewMigration
This will generate a new migration file in the migrations directory.
-
Running Migrations:
./vendor/bin/phinx migrate -
Rolling Back Migrations: If you ever need to undo a migration, Phinx provides a rollback command.
./vendor/bin/phinx rollback
Rollbacks and Fail-Safes
Ensuring you can safely and quickly revert to a previous state is important, especially in production scenarios where downtime or defects can have tangible impacts.
Implementing a Rollback Strategy
-
Version Control Rollbacks: With Git, you can quickly revert to a previous commit if something goes wrong.
# Reverting to a previous commit git log git checkout <previous_commit_hash> -
Deployment Tool Rollbacks: Many deployment tools have built-in rollback mechanisms. For instance, if using Jenkins, you can configure it to archive all builds, allowing for easy rollbacks to previous builds.
-
Database Rollbacks: As discussed previously, tools like Phinx allow for database migration rollbacks.
./vendor/bin/phinx rollback
Monitoring Deployments
-
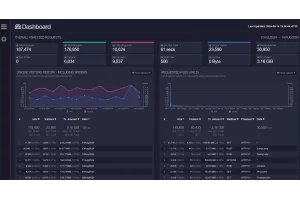
Log Monitoring: Graylog is a popular open source log monitoring tool.
-
Performance Monitoring: Prometheus can be provide insightful data about the performance of your production environments.
-
Error Tracking: Solutions like Sentry can provide real-time error tracking, giving insights into issues users might be facing.
-
Alerting: Incorporate alerting mechanisms to be immediately informed of failures or performance degradation. Tools like ZenDuty can notify your team when something goes wrong.
Best Practices and Tips
Ensuring a smooth deployment pipeline isn't just about the tools and configurations; it's also about adhering to best practices that prevent potential issues and streamline the process.
Ensuring Zero Downtime
-
Load Balancers: Employ load balancers to distribute incoming traffic, allowing for updates without taking the entire site offline.
# Example: Installing Nginx as a load balancer
sudo apt update
sudo apt install nginx -y
# Sample configuration for load balancing with Nginx http { upstream grav_servers { server 192.168.1.100; server 192.168.1.101; } server { listen 80; location / { proxy_pass http://grav_servers; } } } -
Blue-Green Deployment: As previously discussed, maintain parallel production environments. Direct traffic to the 'Green' environment once updates are validated, ensuring zero downtime.
Monitoring and Alerting
-
Consistent Monitoring: Deploying is just the beginning. Continuous monitoring ensures the application remains healthy.
-
Automated Alerts: Set thresholds for metrics like CPU usage, memory consumption, response times, etc. When these are breached, automated alerts can inform you to take corrective action.
-
Regular Audits: Periodically review deployment logs, error reports, and other relevant data to preemptively spot potential issues.


